How to Inspect Teak Deck Caulking & Seams
Teak deck caulking and seam condition is a critical indicator of a boat deck’s quality. Inspecting the caulking and seams can determine the overall deck condition, teak deck thickness, and remaining life of the deck.
MISSING OR DETACHED CAULKING
On a dry deck, examine the seams between the planks to look for missing or detached caulking. If no caulk seam failures are visible, wet the boat deck. As the deck dries, look for areas along the edges of the caulk seams that stay wet longer than the surrounding teak. This is where caulk failures may exist.
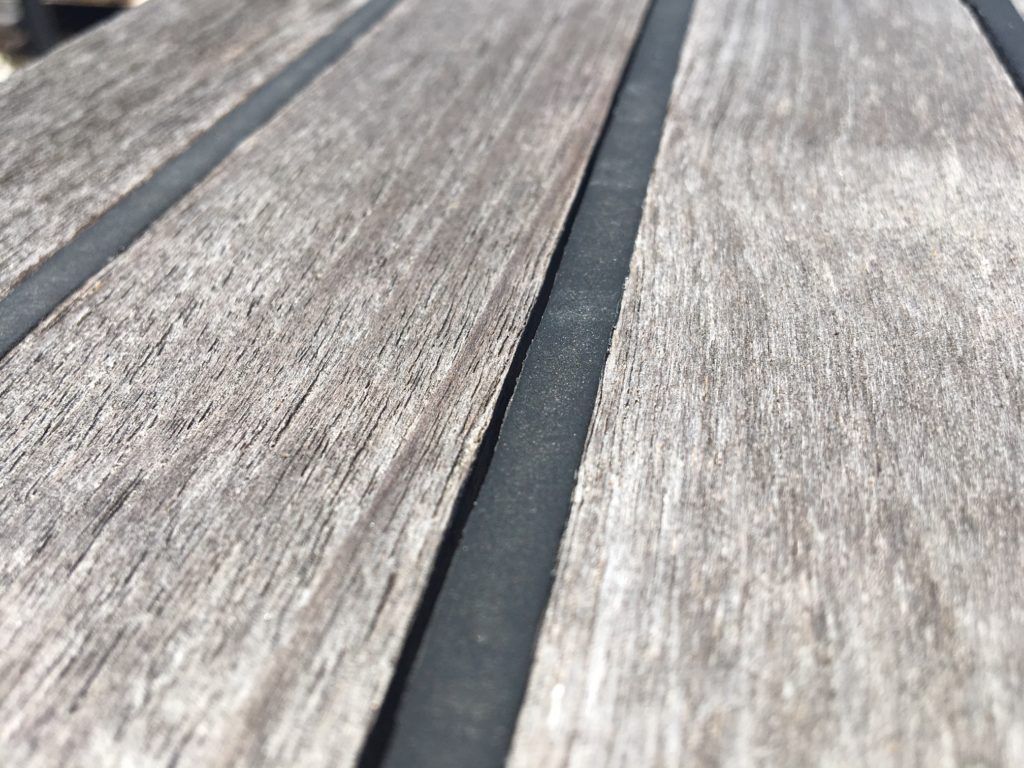
Detached Caulking – Allows Water Penetration
VARYING SEAM WIDTH
For quality teak decking caulking, the width of caulk seams will not vary along the length of the seam. If the seam widths vary, the deck was either poorly laid, or the seams have been re-cut and re-seamed. A boat deck in this condition may be in the last third of its life.
CAULKING CONDITION
Cracked or hard caulk cannot flex as the teak expands and contracts. This may result in leaks. The only solution is to remove the old caulk and re-caulk the seams if there is enough seam depth available.
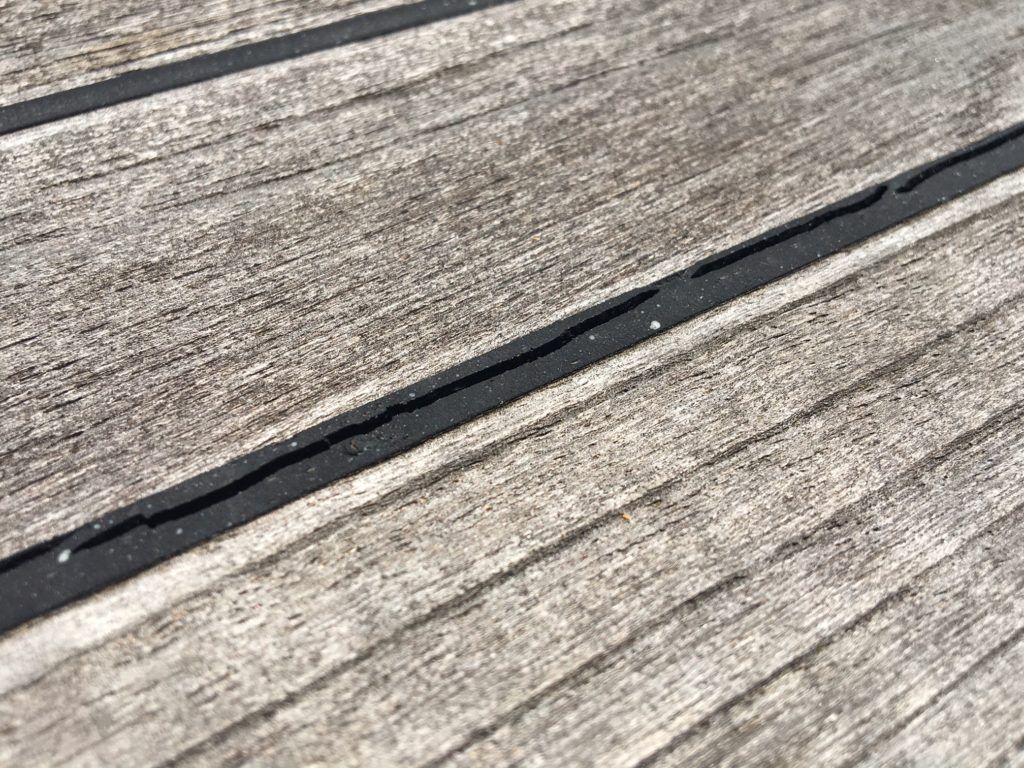
Cracked Caulk – Allows Water Penetration
TEAK CONDITION
Where caulking is visibly separated from the teak or missing, look at the edges of the teak where the caulking should be bonded. If the teak edges of the seams are very thin relative to the width of the seam, there is no longer enough bonding surface for new caulking to stay attached.
If the teak surface is ridged, it will need to be sanded. It is possible the sanding will reduce the thickness so there may not be enough viable edging for re-caulking.
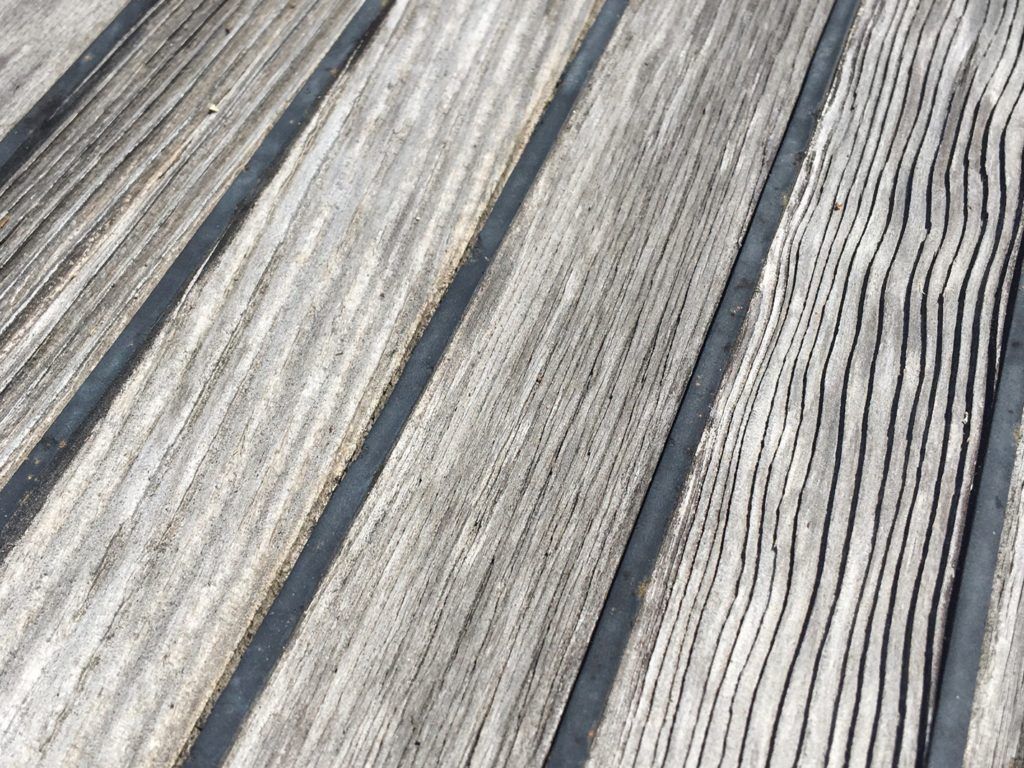
Extreme Ridged Surface of a Teak Deck
DETERMINING TEAK THICKNESS
When inspecting teak thickness, be aware that it will not be the same everywhere. Typically, bows, sun decks, uncovered aft decks, and swim platforms wear faster due to more sun, sea, and human activity.
HATCHES
The deck’s current thickness often can be determined by simply opening hatches and looking at the edges of the hatches and the deck surrounding the hatch.
MEASURE CAULK SEAM DEPTH
A slightly more invasive measuring procedure is to (1) slide the tip of a penknife or ice pick into a caulking seam until it bottoms out, (2) mark the deck surface with your thumbnail, and (3) withdraw the pen or pick to see the depth.
RABBETED DECKS – CAUTION NEEDED TO MEASURE
In traditionally laid teak decks, one or both edges of the planks can be rabbeted. A rabbet is a notch, usually square, cut into the edge of a board. Rabbets create the space for the caulking while leaving the bottom of the plank full width to serve as a spacer for the caulk seam.
When using the penknife or ice pick procedure to check the thickness of a traditionally laid teak deck, it is necessary to know where the edges of the two planks meet under the caulking – in the center or along one edge of the seam. This enables proper placement of the blade or a pick to reach the bottom of the deck, between the planks.
If there is sufficient teak thickness in a rabbeted deck, the existing caulk seams can be cut deeper to create the proper bonding surfaces and then be re-caulked, thereby saving the deck for several more years. Sometimes, the downside is that the process of cutting the seams deeper is not as accurate as of the original machining of the wood. As a result, once caulked and sanded, the seams will vary slightly in width and not be as crisp as the original ones.

Source: “Proper Seam Composition” by Teakdecking Systems (Rabbeted Deck on left)
Read more…Teakdecking Systems 16-pp Guide on How to Properly Caulk Seams
COST OF RESEAMING VS. NEW TEAK DECK
The cost to reseam a teak deck is lower than buying a new teak deck. Often, it is one-third to one-half the cost of a new teak deck.
BEST TIPS FOR EXTENDING DECK’S LIFE
Hopefully, the inspection of teak deck caulking will reveal little more than the need for some love and attention. To extend the deck’s life and push off the eventual replacement as long as possible, it is imperative to keep the deck fully sealed from water intrusion. Trapped water under the deck planks can cause deck delamination from beneath. It can also leak into the structural sub-deck (and possibly interior) through hardware fastener holes. For these reasons, it is important to replace any missing bungs and reseal any caulk seams with damage. If the deck cannot be properly sealed after these steps, a deck replacement is necessary.
A careful survey of a teak decking (and caulk and seams) by an expert can provide the best information about teak decking condition. This can help to determine if a deck should be repaired or replaced.
Want to know how to recaulk seams? Read this article: How to Recaulk Seams
Additional Questions?
Call 941- 756 0600
Email customerservice@teakdecking.com
ALL PRODUCTS


