Yacht Deck Installation Workflow for Complex Yacht Refits
Yacht refits are among the most demanding projects in the marine industry. Unlike new builds, refits require working within existing structures, tight shipyard schedules, and coordination with various suppliers. When it comes to yacht deck replacement, success depends on experience, precision, and clear communication from start to finish.
At Teakdecking Systems (TDS), we approach every yacht deck installation during a refit with a structured workflow designed to minimize disruptions, protect the vessel, and deliver a flawless finished deck, anywhere in the world.
Explore our completed yacht decking projects.
How We Execute A Yacht Deck Replacement
A professional yacht deck replacement project typically involves more than just removing old teak and bonding down new planks. A successful deck replacement requires both technical precision and a structured execution plan. Our workflow ensures each phase is controlled and coordinated within the larger refit schedule.
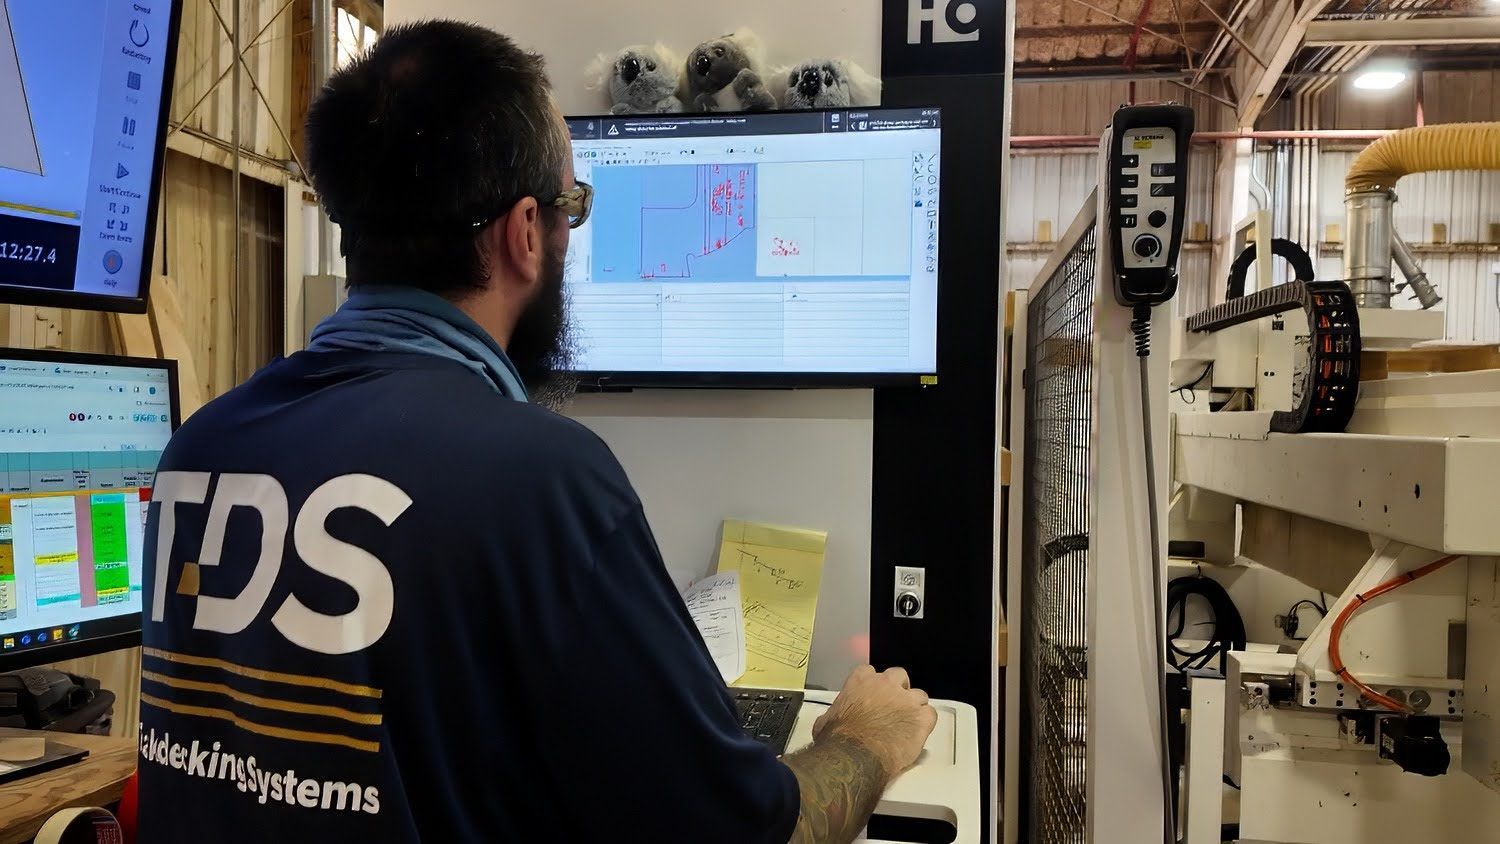
Digital Templating & Engineering
The first step is templating. A member of our team travels to the vessel to digitally template the existing deck before any removal begins. These digital files are then passed to our engineering team, who design the new deck to exact specifications, ensuring correct margins, seam layout, and overall geometry.
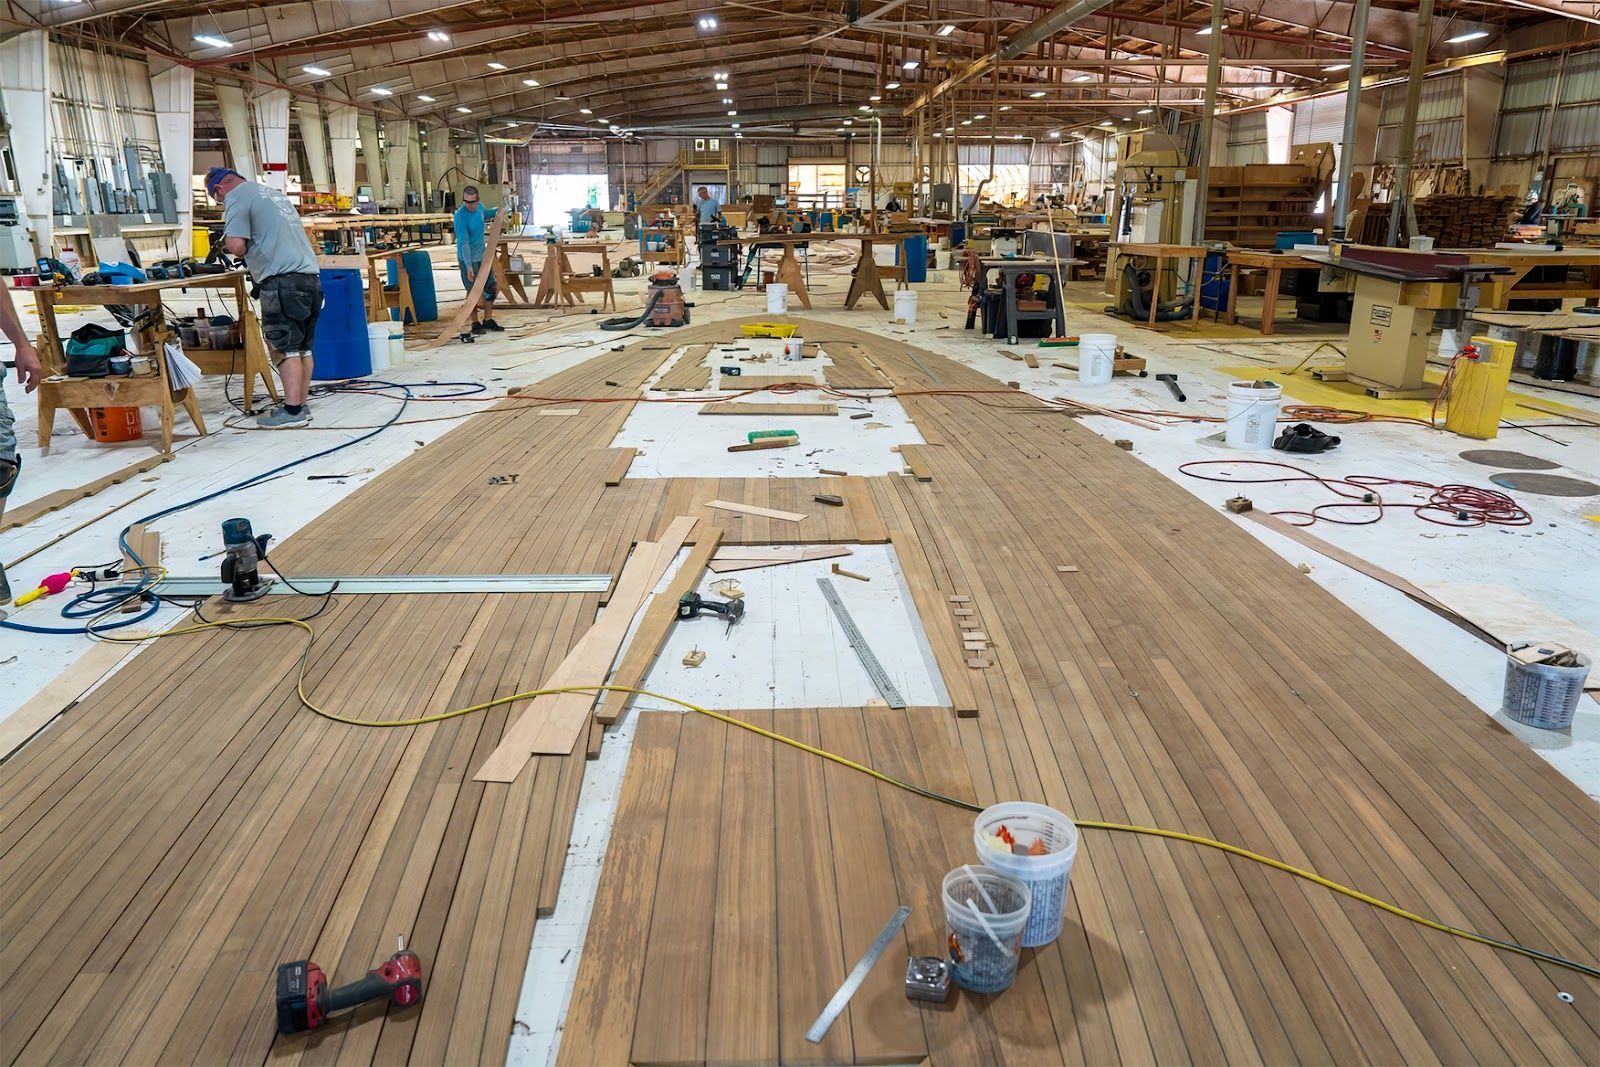
In-House Manufacturing
Once the design is finalized, the deck is manufactured in-house. It is built, caulked, and sanded under controlled conditions before being prepared for installation. Manufacturing the deck off-site allows for greater quality control and reduces time onboard the vessel.
Removal & Substrate Evaluation
After manufacturing, the existing decking is carefully removed. The substrate is inspected for moisture, bonding integrity, and structural stability. Any necessary repairs are completed before installation proceeds.
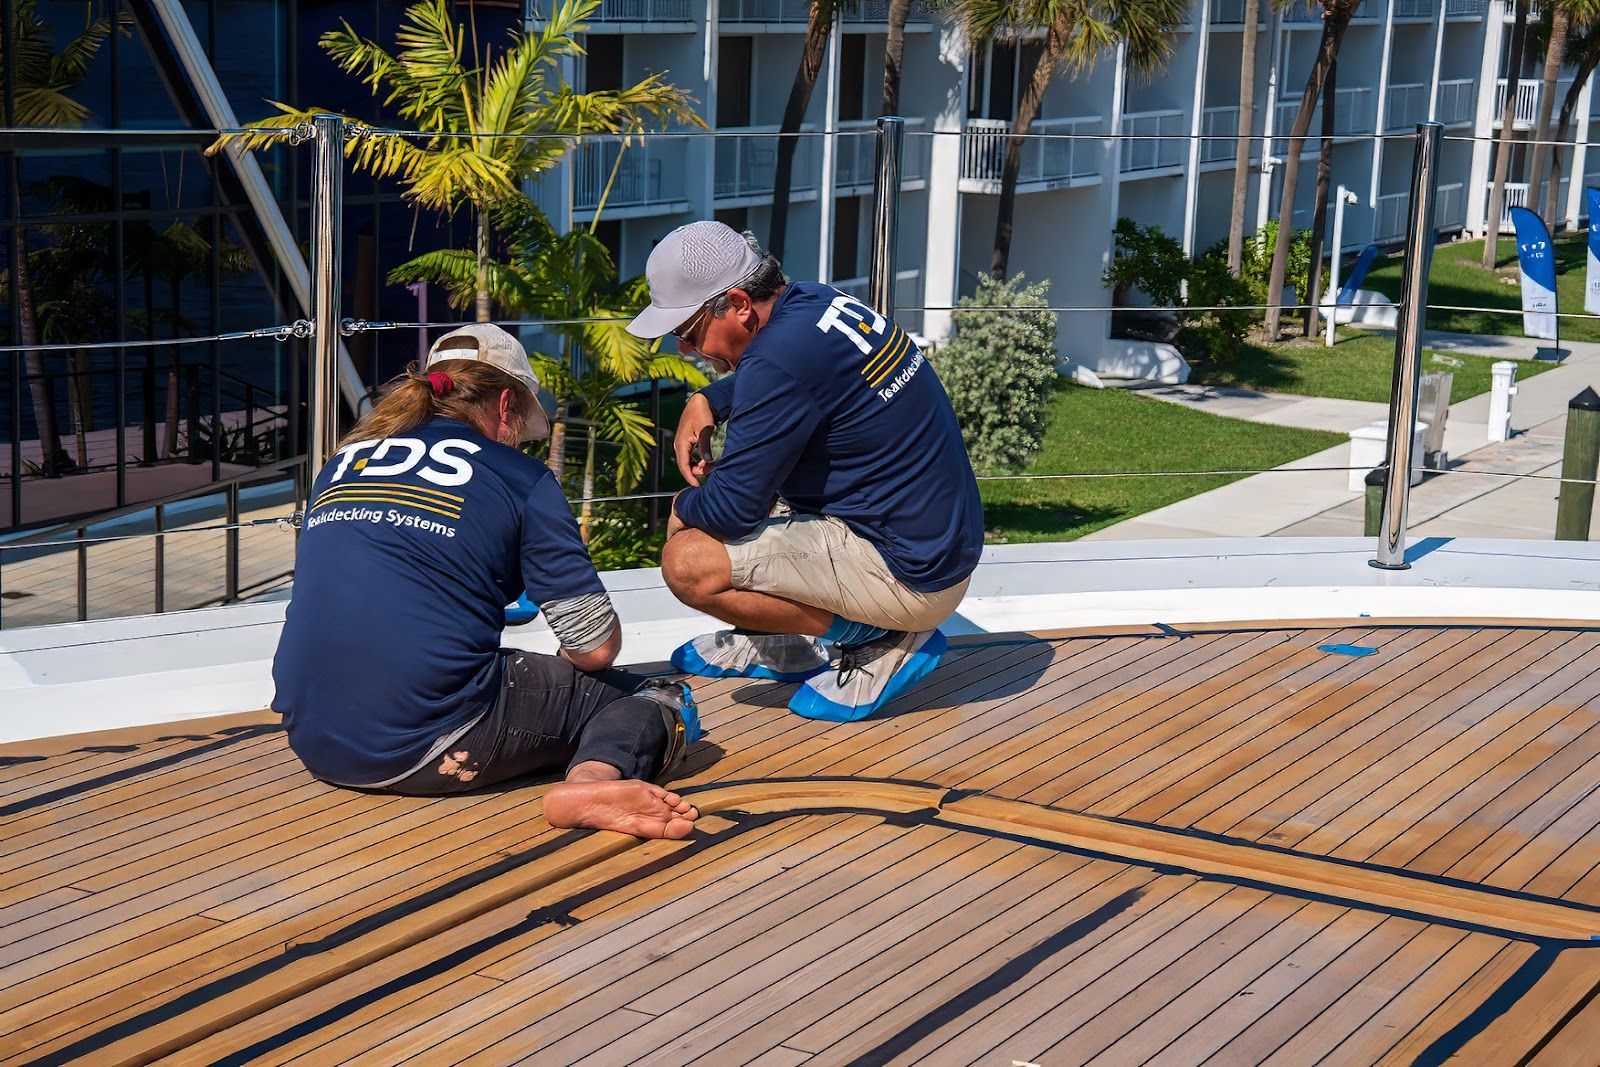
Installation & Finishing
The manufactured panels are dry-fitted to confirm alignment, then bonded using marine-grade adhesives under controlled conditions. Final detailing and quality checks are carried out to ensure long-term durability and performance.
Each step must be executed carefully to avoid future failures such as delamination, water ingress, or seam breakdown.
Read here for a complete guide to adding or replacing a teak deck.
Why Refit Projects Demand Experience and Coordination
Yacht refits are far more complex than new builds. For new projects, decking is installed on a clean substrate, whereas refits involve ageing surfaces and unknown conditions hidden beneath old teak. Once removal begins, issues like moisture intrusion, adhesive breakdown, or even core damage can come to light. When that happens, quick decisions and clear communication are essential.
That’s where experience really matters. An experienced decking team can quickly assess substrate conditions, determine whether the structure is fit for installation and recommend the appropriate next steps without delaying the overall refit schedule. In these environments, informed decision-making and problem-solving are just as crucial as precise installation.
At TDS, we focus exclusively on decking, but refit projects typically operate alongside other shipyard trades. Deck replacement must be sequenced within a broader schedule to work effectively. Without experience and coordination, delays and costly changes can escalate. A structured workflow, proactive planning, and close collaboration with shipyards, captains and project managers ensure the yacht deck installation progresses efficiently.
Protecting Vessels During Yacht Deck Installation
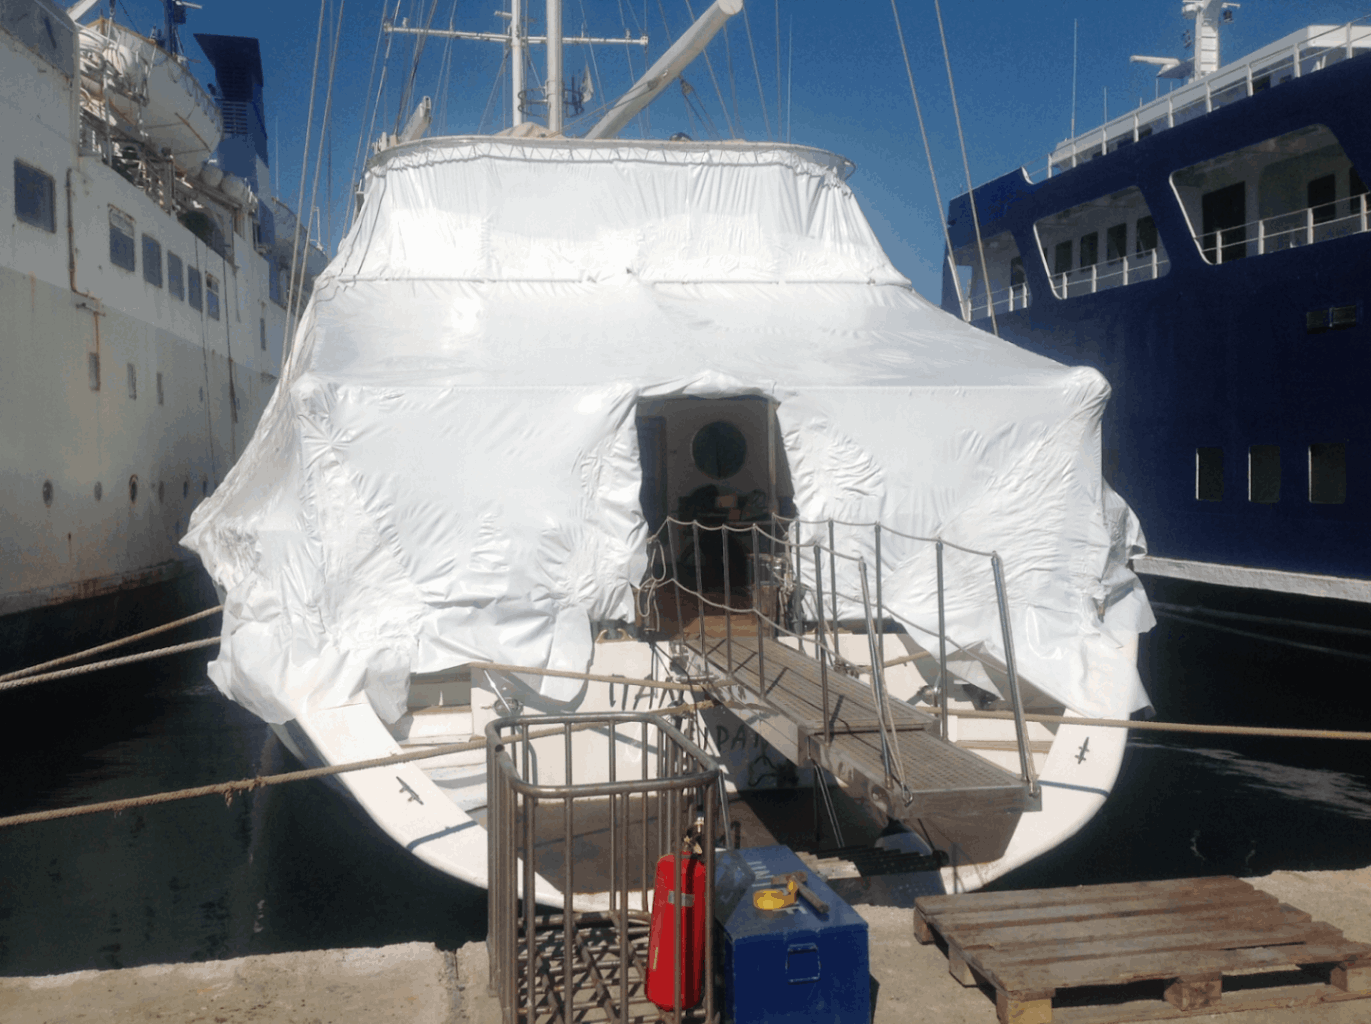
At TDS, we strongly recommend choosing a shipyard that can properly protect the vessel during a refit. A controlled environment isn’t just a preference; it plays a major role in protecting the yacht and ensuring adhesives cure correctly for long-term performance.
When planning a yacht deck replacement, it’s important to work with a shipyard that can provide:
- A watertight shed or temporary tent enclosure
- Climate and humidity control
- Proper dust containment and site preparation
- Surface masking and hardware protection
- Controlled access to freshly installed decking during curing
These measures help prevent moisture issues, contamination, and unnecessary damage during the installation process. With the right protections in place, deck installation can proceed efficiently, delivering a finish that not only looks exceptional but also performs reliably for years to come.
Explore more yacht deck installation considerations.
Avoiding Hidden Costs and Change Orders
Refit projects can become expensive quickly if problems are not identified early. Once old teak is removed, hidden issues may appear. If these aren’t anticipated, they can lead to delays and unexpected change orders.
The best way to control costs is through upfront planning and clear communication. Defining the scope of work, confirming who is responsible for any substrate repairs, and aligning the deck installation schedule with the shipyard help prevent surprises. Documenting conditions before work begins also keeps expectations clear.
While no refit is completely free of unknowns, experience makes a significant difference. A structured approach and proactive coordination keep the yacht deck replacement projects running smoothly, protecting both the timeline and the budget.
Yacht refits are demanding, but with the right planning and experience, they don’t have to be stressful. A clear process, strong coordination, and the ability to adapt when surprises arise make all the difference.
We bring a focused approach to every yacht deck replacement and work closely with shipyards and project teams to keep installations on track. No matter where the refit takes place, our goal is simple. To deliver a high-quality deck that looks exceptional, performs reliably, and is built to last.
Get in contact with Teakdecking for a quote on your next yacht deck refit.
Get in contact with Teakdecking for a quote on your next yacht deck refit.
ALL PRODUCTS