How to Recaulk Seams

“I’d rather burn my boat to the waterline before I recaulk seams again,” a boat owner said to our Sales Manager at a recent boat show.

Then the boat owner laughed and said, “Of course, my family and I love the Hylas 54 too much to do this. But I sure did have some frustrations, largely my fault. It was my first recaulking job, and it was a big one with nearly one mile of seams.”
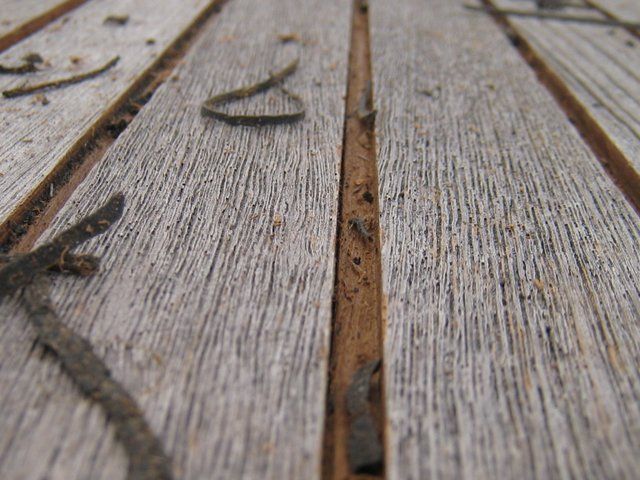

Aged teak deck

At TDS, we understand that it’s a big job. An aging teak deck can have proud caulking. Scuffing a foot on the deck could loosen the caulk. Or tugging on the caulking will easily pull it up. Additionally, if caulk has separated from the teak planking, it will eventually loosen if not repaired. These gaps will trap water and potentially cause damage.


We have perfected the art of caulking and want to share advice to prevent frustrations like those of the owner at the boat show. Here, we provide some time-tested tips, and if you call us, we will walk you through the process. We want your re-seaming project to be a success.


SIS 440 Caulking, a proprietary formulation, expands and contracts with boat movement and temperature changes. Caulk is designed to do this.


Teak naturally wears 0.25 to 0.5 mm/year, which will cause the caulking to become “proud.” So, it is essential to watch the deck as it ages and to perform a light sanding for periodic maintenance. This sanding will remove the proud caulk and keep the teak surface smooth. A smooth teak surface prevents trapping dirt.


BEFORE STARTING TO RECAULK SEAMS TAKE THESE NECESSARY STEPS


1) DETERMINE THE DEPTH OF THE SEAM

Seams should have a depth of 5/16 to 1/2” (8-12 mm)* for recaulking to be successful (and cost-effective). Do not fill shallow seams because there could be adhesion problems.


*Seams sizes could vary with larger and thicker planks.


Seam is too shallow for re-caulking

2) CHOOSE THE BEST LOCATION FOR TO RECAULK SEAMS

Always work under a cover. Ideally indoors for protection from rain or snow. Indoor temperature control will enhance caulk cure time. Ideally, the temperature should be 40-90°F or 5-33°C. If unable to work under a cover, only open as much seam as can be cleaned and recaulked on the same day.


3) SAND THE DECK

Before beginning to recaulk seams, a light sanding of the deck creates a smooth surface so that caulking does not fill any ridges in the teak. This pre-sanding will make the final sanding (after re-caulking) much easier, saving time.
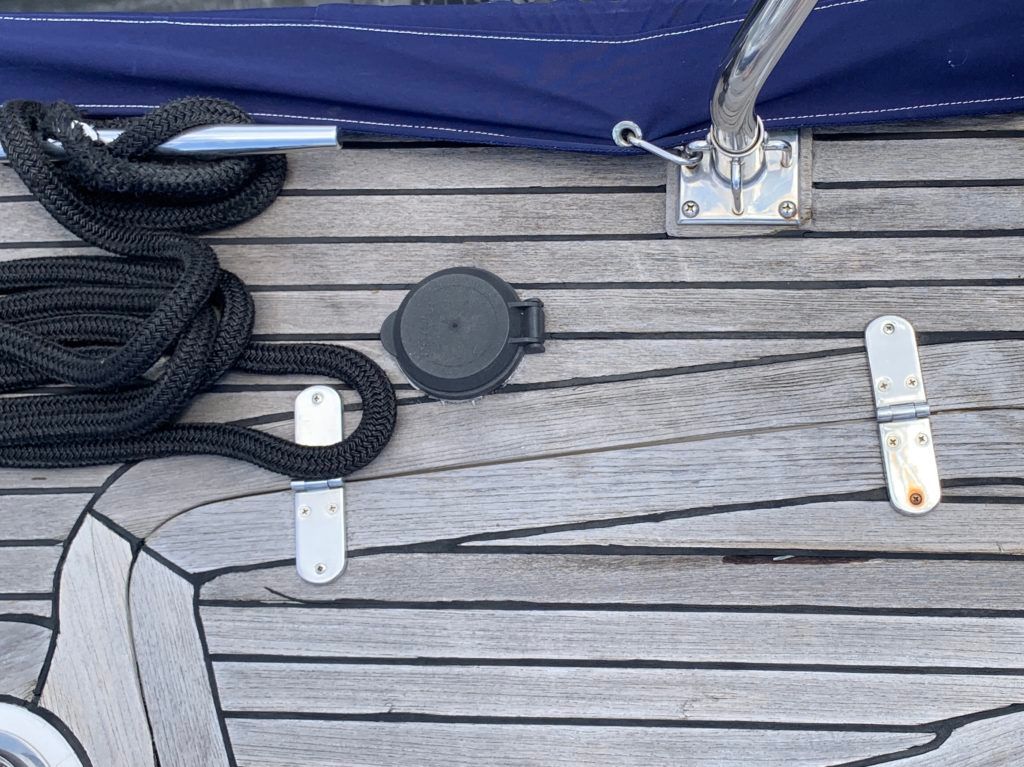

4) REMOVE HARDWARE

Since sanding is required before and after recaulking, the hardware will rest on proud teak if it is not removed.


5) READ THE APPLICATION INSTRUCTIONS ON THE CAULK PACKAGING

Instructions are carefully written to help users (with SIS 440).


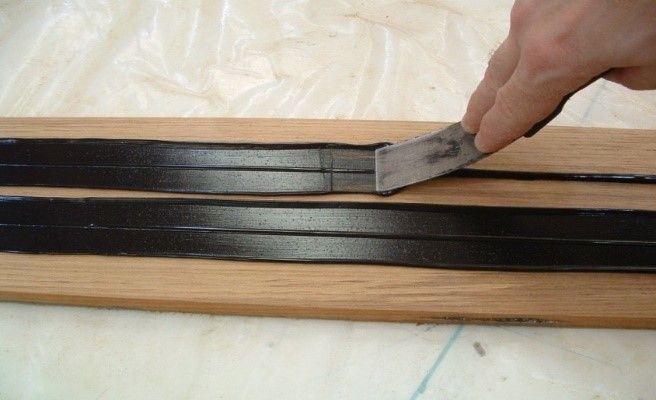
REMOVING OLD CAULKING

Remove ALL caulk to prepare clean seams of fresh wood for new caulk. For small jobs, remove caulk with a razor and reefing hook.


For large jobs, electric tools are better. A Fein tool with a teak caulk removal blade works well. For experienced users, a saw or router can be used.

Regardless of the tool, work carefully to not gouge the edges of the seams. Then, the seams MUST be sanded, vacuumed, and cleaned with acetone. Fresh, clean wood ensures optimal adhesion.


BOND BREAKER TAPE IN SEAMS

Place bond breaker tape at the bottom of the seam. The tape prevents an adhesive bond of the caulking to the bottom of the seam, allowing movement during caulk expansion and contraction.


FILLING THE SEAMS

The temperature must be at least 40°F (5°C) when caulking. Fill seams with a manual gun, electric gun, or pneumatic gun. Regardless of the gun type, cartridge tip preparation is the same.


Cut the tip of the cartridge at an angle. Then insert a screwdriver to puncture the foil lining. After completing this, squeeze the tip to flatten it. This will help to align the tip with the seam. NOTE: Fully open the tip and foil, or caulk may push out from the back of the cartridge.


Begin application and ensure caulking goes to the bottom of the seam, allowing it to flow upward until crowning above the top of the seam. Smoothly pull the gun along the seam toward the applicator. Avoid starts and stops or changes in direction that may entrap air.

If using a pneumatic caulk gun, do not exceed 80 psi to prevent overriding the plunger and injection air into the caulk.


Immediately after applying the caulking, draw a flexible putty knife over the seam. Apply enough pressure to make sure caulk fills to the bottom of the seam, and then crowns to allow for slight settling. Make sure the seams have no entrapped air after application. Do not disturb the caulking until fully cured.


Apply pressure to fill seam. Be sure that caulking crowns.

Masking the teak before caulking may be done. Place tape 1 mm from the edge of the seam. Note: It will require more pressure to fill the seam with the putty knife with a masked edge.

CURING

Cure time is a function of the cross-sectional dimension of the seam and ambient temperature and humidity. Cold or very dry air will increase the cure time. Caulking cures from the top down at a rate of about 1-2 mm/day with a maximum rate of 3mm/day. Allow at least 48 hours. White and gray will take longer, so please read about these special considerations at https://teakdecking.com/caulk/

SANDING AND FINISHING

Sand using 80-100 grit sandpaper with a soft pad on a grinder. Do not use orbital and belts sanders because they may “dig” into the teak. A Fein tool with a sanding pad is good for the corners. Hand-sanding is required for details that cannot be reached with power tools. Rich brown teak and razor-sharp seams appear as the caulking is sanded away.


If there are gaps, bubbles, or under-filled seams, it is due to improper caulking. The seams were not filled properly or did not cure adequately.


This deck was not sanded before recaulking, making it difficult to sand off the caulking

We want your project to be successful. To recaulk seams, follow these recommended guidelines and read our free 16-page Caulking Guidebook: Teakdecking.com/caulk. Or Call us if you have questions and we will walk you through the process.


Read more articles:

How to Inspect Teak Deck Caulking and Seams

Application Techniques for Gray and White Caulking

What is the Caulk Yield for Teak Deck Caulking

CONTACT TEAKDECKING SYSTEMS

941-756-0600

products@teakdecking.com

The Professional’s Choice


ALL PRODUCTS

May 26, 2025
Can I touch up sunken caulk after it has been applied incorrectly? Yes, you can apply additional caulk over areas that have settled after the initial application. Best Practices for Re-Caulking: 1. For Older Installations: If the existing caulk has been in place for an extended period and has fully cured or “seasoned,” it is best to prepare the seam before applying more caulk. The recommended method is to cut a shallow “vee” (V-shaped groove) into the existing seam. This increases the surface area for better adhesion. After veeing the joint, thoroughly wipe the area with a clean rag soaked in acetone, then apply the new caulk. 2. For Newer Installations: If the caulk was applied recently (within a week or two), the surface is still fresh and may not require veeing. In this case, simply clean the area with acetone and apply additional caulk directly over the low or settled spots. General Reminder: Regardless of the age of the installation, always clean the surface with a rag soaked in acetone just before applying new caulk. This ensures a clean, contaminant-free bonding surface and helps the new caulk adhere properly.
April 28, 2025
How To remove old caulking from your deck and & Re-Caulk your Seams
By Anella Alcott April 11, 2025
If you're planning to get a new deck on your boat, and you've chosen teak, a composite deck, or a cork alternative, this guide will walk you through the full process, from digitization and manufacturing to final installation so you’ll know exactly what to expect from start to finish. TEAK DECKS Digital Templating The first stage involves one of our technicians digitially templating the area using the latest in precise measuring technology. Our team digititally templates vessels all around the world. Engineering Our experienced designers are masters of creating beautiful and technically precise decks using CAD construction program, importing data provided by our digital templating team. Our designers’ exceptional ability to create visual symmetry ensures impeccable finishes and beautiful aesthetic decks. Manufacturing TDS panels are manufactured in our factory utilizing jigs that are adjusted to conform to the vessel’s shape. Teak planks of the required thickness and width are carefully hand inspected, scrutinizing each plank for grain orientation, mineral deposits, or imperfections such as a small knot. The planks are placed into the jig in such a way that the finished deck will have a uniform butt joint pattern. Creating a Watertight Barrier A phenolic or fiberglass backing is securely vacuum bonded to the teak, using our own epoxies that guarantee durability, flexibility, strength and reliability. The exceptional bonding strength, ensures your deck stands the test of time. After the epoxy cures, the newly formed panels are removed from the jig, and the seams between the planks undergo routing, cleaning, and caulking. Margin Trim Once the caulking is cured, the final step involves laying out the teak deck and laying all the margin trim. Upon completion, the finished deck undergoes a thorough quality inspection, ensuring it aligns precisely with the template. Transport & Installation The finished deck panels are placed in custom-made crates and then shipped and installed worldwide. Prior to the arrival of the new deck, the old deck is removed. Our installers inspect for any issues such as water intrusion, delamination, or corrosion on the vessel’s surface. If such issues are found, the areas are repaired before the new deck is installed. Caulking & Sanding Once the deck has been bonded to the vessel, it is time to caulk using our own proprietary, UV, and chemical-resistant caulking TDS SIS-440. After curing, the deck is then ready to be sanded. The entire deck is sanded with 36 grit to remove excess caulking, followed by 60 and 80 grit to enhance the look of the deck. COMPOSITE DECKS Digital Templating The first stage involves one of our technicians digitially templating the area using the latest in precise measuring technology. Our team digititally templates vessels all around the world. Engineering Our experienced designers are masters of creating beautiful and technically precise decks using CAD construction program, importing data provided by our digital templating team. Our designers’ exceptional ability to create visual symmetry ensures impeccable finishes and beautiful aesthetic decks. Manufacturing Every composite decking panel is custom made to perfectly fit the areas to be covered. The panels are delivered with completed seam pattern, sanded and ready to be glued down on most structural surfaces. In the case of SeaSole, the deck is installed using the “peel and stick system”. We use a combination of our TDS bedding and bonding adhesive, along with TDS two-part, flexible epoxy fitting glue, to secure the panels in place. The caulking in the seams is our TDS proprietary patented filler, an enduringly elastic, solid rubber polyurethane joint sealant. Our team will first carry out an inspection of the boat to identify the best application method for each area. Quality Control Once the caulking is cured, the final step involves laying out the composite deck and building all the margin trim. Upon completion, the finished deck undergoes a thorough quality inspection, ensuring it aligns precisely with the original template. Installation The finished deck panels are placed in custom-made crates and then shipped and installed worldwide. Prior to the arrival of the new deck, the old deck is removed. Our installers inspect for any issues such as water intrusion, delamination, or corrosion on the vessel’s surface. If such issues are found, the areas are repaired before the new deck is installed. C ORK DECKS Digital Templating The first stage involves one of our technicians digitially templating the area using the latest in precise measuring technology. Our team digititally templates vessels all around the world. Engineering Our experienced designers are masters of creating beautiful and technically precise decks using CAD construction program, importing data provided by our digitizing team. Our designers’ exceptional ability to create visual symmetry ensures impeccable finishes and beautiful aesthetic decks. Manufacturing Every cork decking panel is custom made to perfectly fit the areas to be covered. The panels are delivered with completed seam pattern, and ready to be glued down on most structural surfaces. Our team will first carry out an inspection of the boat to identify the best application method for each area. Creating a Watertight Barrier After the adhesive cures, the seams between the planks undergo routing, cleaning, and caulking. Installation The finished deck panels are placed in custom-made crates and then shipped and installed worldwide. Prior to the arrival of the new deck, the old deck is removed. Our installers inspect for any issues such as water intrusion, delamination, or corrosion on the vessel’s surface. If such issues are found, the areas are repaired before the new deck is installed. We use a combination of our TDS bedding and bonding adhesive, along with TDS two-part, flexible epoxy fitting glue, to secure the panels in place.
ALL ARTICLES